
Knit Mitered Square Blanket


For the sock yarn blanket you will need:
Size 1 ½ needles (I use two needles from a set of double points with point protectors on the ends)
A variety of leftover sock yarn (or some new sock yarn!!)

(I know you know how to cast on, but I wanted you to see a photo of the needles with the point protector. I also use a 1 1/2" small circular needle ordered from www.paradisefibers.net
Row 1: Knit all stitches. Turn.
Row 2: Knit 14 stitches. Double decrease as follows: Insert R needle into 2 stitches as if to knit them together but instead slip BOTH stitches simultaneously over to the right needle. Knit the next stitch, and simultaneously pass both slipped stitches over the knit stitch and off of the R needle. This decreases the row by 2 stitches and leaves the center on top. Knit the last 14 stitches. Turn. (29 stitches)


Row 3: Knit 14 stitches. Purl the middle stitch. Knit 14 stitches. Turn.
Row 4: Knit 13 stitches. Double decrease as in Row 2. Knit 13 stitches. Turn (27 stitches)
Row 5: Knit 13 stitches. Purl the middle stitch. Knit 13 stitches. Turn.
Row 6: Knit 12 stitches. Double decrease as in Row 2. Knit 12 stitches. Turn. (25 stitches)
Row 7: Knit 12 stitches. Purl the middle stitch. Knit 12 stitches. Turn.

By now you can see a pattern. You are only doing the double decrease on the right side rows. When you have only 3 stitches left on the needle, just do the double decrease. This will leave 1 stitch on the needle. Cut the yarn and pull the loose tail through the loop on needle. You have one square completed.

Joining the squares:
Place two squares side by side as shown:

Pick up and knit 15 stitches from the square on the right .....

and 15 stitches from the square on the left. (Note: There are only 30 stitches on the needle at this point.)Turn

Knit the first 15 stitches on the needle. Then make 1 with the yarn that is connecting the two squares. To make one I just picked up the yarn that is between the two squares and gave it a twist and put it on the left needle. This stitch should end up on your left needle because you need to knit it to keep on going. Then knit the last 15 stitches. Total 31. Turn. (You can also do the make 1 as you are picking up the stitches.)
Note: You only have to do the make 1 part on this base row of squares. After you get the row joined together, you will pick up a stitch in the center of the square that is in the row below.


You should be on the front of your work and ready for a decrease row. Do this square the same as you did the individual squares.


You can make your sock blanket as wide and as long as you want.
Good luck and happy stitching. If you have any questions just email me.
LuAnn Krug
weren't complete, and after working on my blanket again lately I've realized they were right. So I hope to clarify some things and show more photos. My apologies to those of you that had a problem because of my directions.
First, you need to decide on the width of your blanket and make that many single squares first. After that, the rest of the squares will be knit on the blanket.

To end the square, slip the first two stitches together. Knit the last stitch.

Slip the knit stitch over the two slipped stitches.

You have one loop left on your needle. I enlarge the loop and pull the tail through the loop and tighten. One square complete.

You need to decide on how wide to make your blanket.

In my original directions I didn't show how to do the make one stitch between the squares in the beginning row. This is a better photo of how to do the make one. I use what is called an e-wrap cast on.

This is what the make one looks like in between the squares.


This is as much as I showed you in the original directions. Then I showed a photo of the part of the blanket I had done.

Here is how to join more squares onto the base row.

Pick up 15 stitches along the edge of the pink square, make one stitch, pick up 15 stitches along the edge of the next square in your base row.

Total of 31 stitches (same as the other squares).

Continue the same as with the other squares.

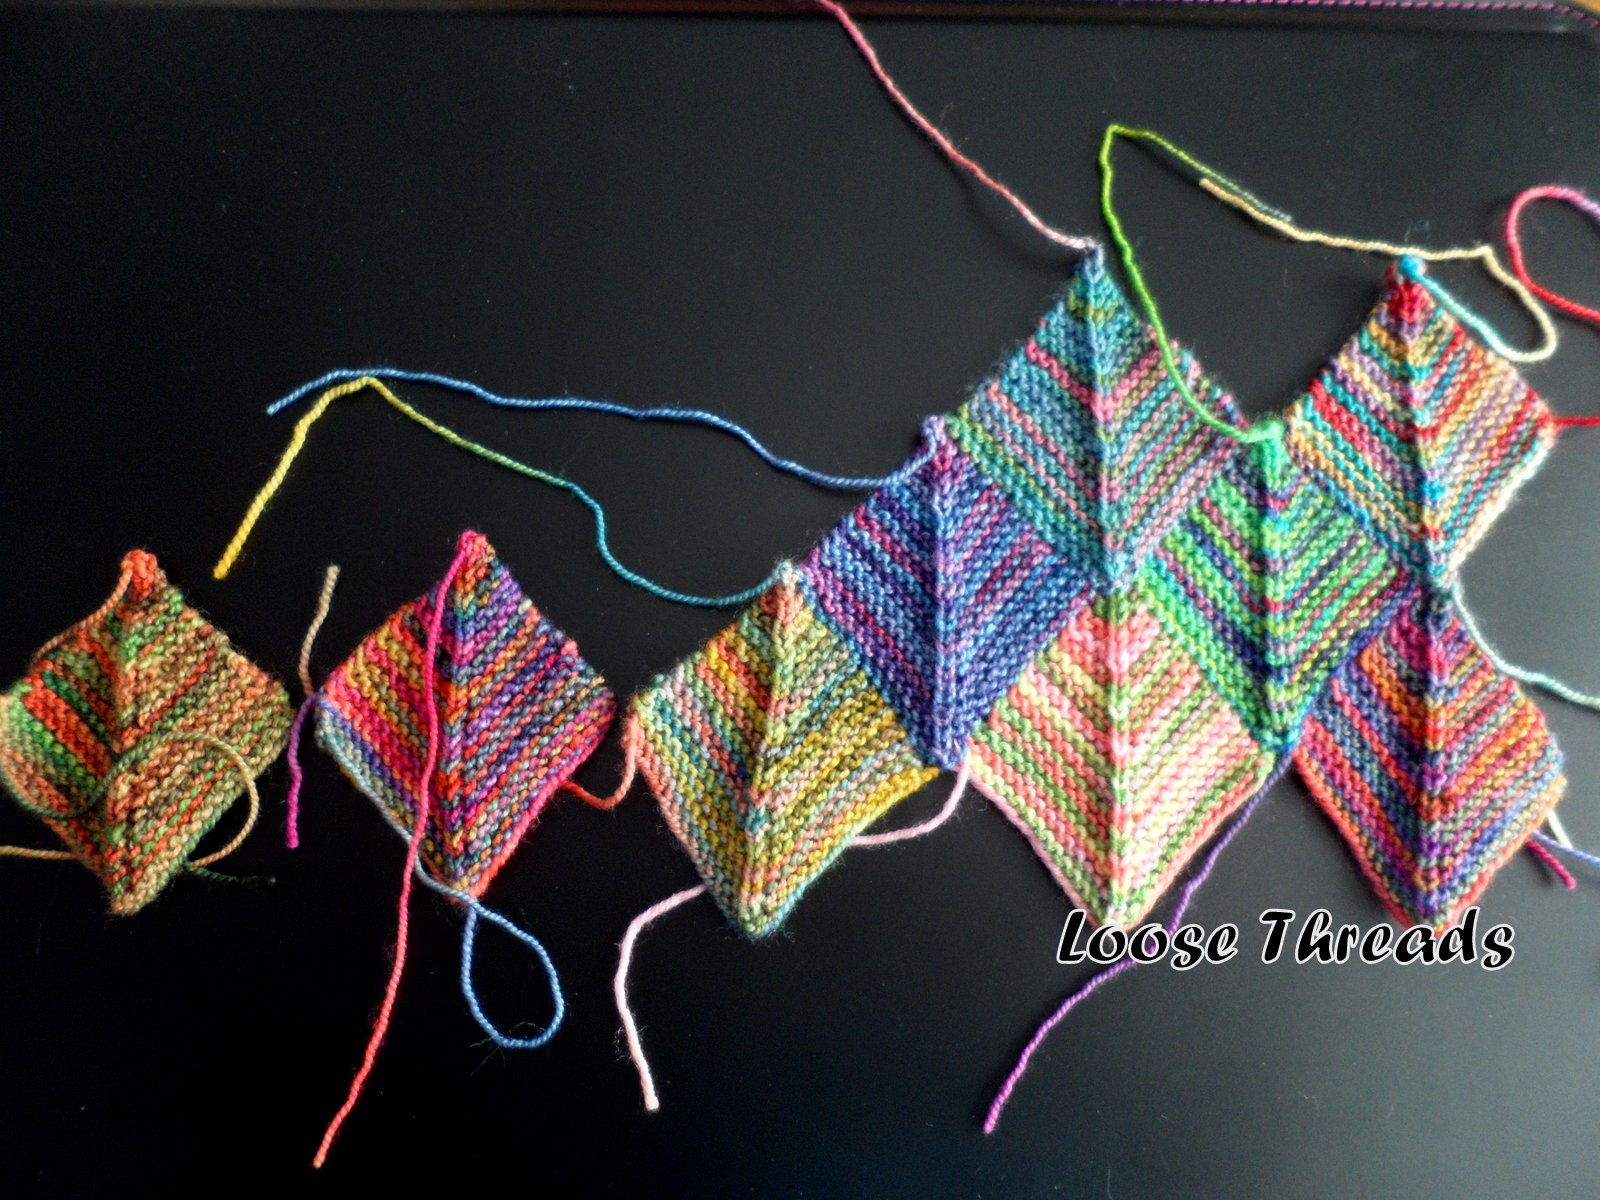
Here are the first 5 squares joined.

You can continue adding as many squares along the base row to make your blanket as wide as you want.

How to add edge squares along the right side.
In the photo above you will need to add a square to the right side of the green square and all other squares along the edge.
Make a slip knot. Cast on a total of 14 stitches using the e-wrap cast on as in the photo below. Total 15.


Pick up stitch number 16 from the top of the square below. Then pick up 15 stitches along the edge of the square as shown in the photo below.

Here is the photo from when I picked up along the edge of the green square in the other photo, but I used a knit cast on instead of the e-wrap cast on. After I finished knitting that square I ended up tearing it out because the knit cast on is too thick and looks out of place along with the other knit edges. So I recommend the e-wrap cast on along the edges. (Photo above.)First, you need to decide on the width of your blanket and make that many single squares first. After that, the rest of the squares will be knit on the blanket.
When you finish a square and have just 3 stitches left on your needles.

To end the square, slip the first two stitches together. Knit the last stitch.

Slip the knit stitch over the two slipped stitches.

You have one loop left on your needle. I enlarge the loop and pull the tail through the loop and tighten. One square complete.

You need to decide on how wide to make your blanket.

In my original directions I didn't show how to do the make one stitch between the squares in the beginning row. This is a better photo of how to do the make one. I use what is called an e-wrap cast on.

This is what the make one looks like in between the squares.

Continue the same way you would if you were making a single square.

This is as much as I showed you in the original directions. Then I showed a photo of the part of the blanket I had done.

Here is how to join more squares onto the base row.

Pick up 15 stitches along the edge of the pink square, make one stitch, pick up 15 stitches along the edge of the next square in your base row.

Total of 31 stitches (same as the other squares).

Continue the same as with the other squares.

Here are the first 5 squares joined.

You can continue adding as many squares along the base row to make your blanket as wide as you want.

How to add edge squares along the right side.
In the photo above you will need to add a square to the right side of the green square and all other squares along the edge.
Make a slip knot. Cast on a total of 14 stitches using the e-wrap cast on as in the photo below. Total 15.


Pick up stitch number 16 from the top of the square below. Then pick up 15 stitches along the edge of the square as shown in the photo below.


You continue knitting the same as with all the other squares.

In this photo you can see that the knit cast on looks a lot thicker than the other edges.

Here is the square added to the right edge.

Next knit the square in between as shown below. Pick up 15 along the green square, pick up one in the top of the light pink square, pick up 15 along the purple. (Total of 31.)

For this example, I decided to stop this project with just 3 squares wide and make a scarf.

Here is how you add a square to the left side of your blanket.
First pick up 15 stitches along the edge of the square.
First pick up 15 stitches along the edge of the square.

Stitch number 16 goes in the top of the square below. Then add 15 more stitches using the e-wrap cast on.

You have 31 stitches on your needle again.

Continue as with the other squares.

If you were making a blanket you need to add the squares along the bottom first until you reach your desired width.

This is the beginning of my scarf.

My blanket is 15 squares wide.
This is the beginning of my scarf.

My blanket is 15 squares wide.

I've also started the scarf on the left (my daughter's idea) making the squares go in a zig-zag pattern.

